

I recently was inspired by something I saw at Rookie.com, and decided to create my own version of it. See the original here: http://www.rookiemag.com/2012/08/summer-of-love-one/
I thought it was such a cute idea for a banner, and a really fun way to leave yourself an empowering message to look at often. I also just loved the fringe and glitter combination. (Gliiiiittteerrrrr *shiny eyes*) I knew right away I was going to have to make my own version, which you can find below! It was a very inexpensive craft, cost me less than $5.00 total to make. However, I will say it was rather time-consuming to create, simply due to some of the tasks involved. If you decide to give this craft a try, and make your own banner, please leave a comment and show me how yours turned out!
Supplies:
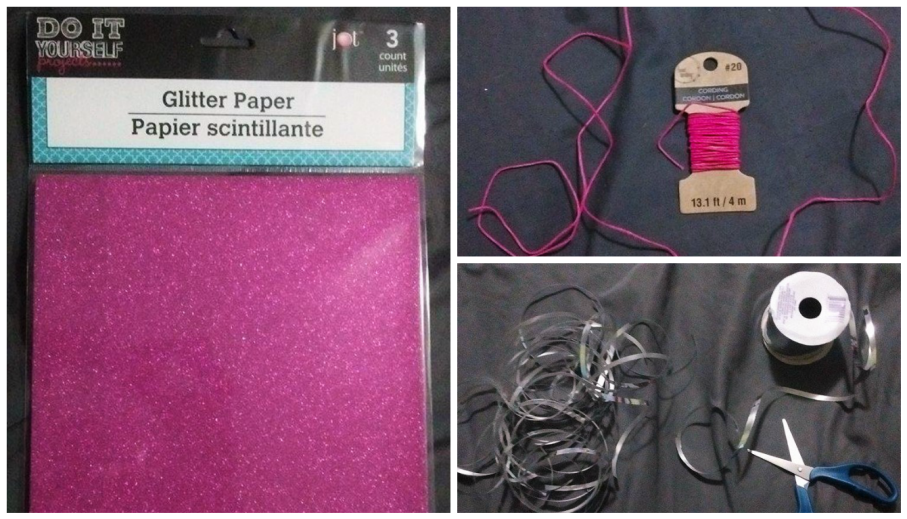
- Glitter paper, from my local d0llar store
- Cording by Bead Landing, found on sale at Michael’s
- Curling ribbon, also from my local dollar store
What I Did:
I free-handed stencils of the letters, using standard typing paper. I will warn you now, I free-hand nearly all of my measurements. If that method works for you, wonderful. If not, obviously feel free to measure away, and I’ll try to give some rough measurement info whenever I can.
I taped the stencils I cut out on to the glitter paper to hold them in place as I cut my letters. You may want something more stable such as cardboard for your stencils, which I’m sure would also work fine. Alternatively, you could make the letters themselves out of cardboard. Decorating could include paint, decopauge, glitterifying them yourself, or some other method. In my case, I was able to fit about 3 letters per sheet of glitter paper, with a little bit of room to spare. My letters are around 5 1/2 inches tall.

I cut the ribbon into several strips, and began tying them to the cord. My ribbon strips were around 14 inches long. I knew the curling would shorten them quite a bit, so I made them significantly longer than my letters. I would like to point out that there are infinite methods for making the fringe part of the banner. You could use fabric ribbon, cord, yarn, tissue paper, wrapping paper, scrapbooking paper, cardstock, etc. The nice thing about crafts like this is that it is really not necessary to use specific supplies. They are very open to interpretation, and you can achieve the result you want with pretty much whatever strikes your fancy.
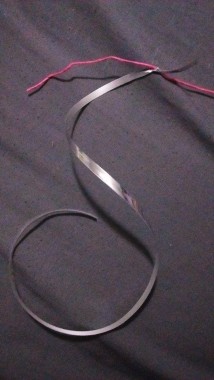
I used regular craft scissors to curl all of my ribbons. It resembled some kind of Christmas decoration at this point. On that note, the curly ribbon cord could totally be a used as a decoration by itself for Christmas or a party. Inexpensive and pretty is the way to go people! I will point out though that what you save in money, you’ll likely make up for in time, at least in this case. Tying all of the ribbon strips to the cord took quite a while, it took me well over an hour. Lets be honest though, if you’re into crafts, you probably don’t mind spending a little bit of time on it. The process is part of the fun!

Next I taped the letters to a cord of equal length to the one I used for the ribbon. I would reccommend using two separate cords, one for the fringe, and one to hold the letters. This way the letters are on top of whatever you use for fringe, instead of inbetween the fringe.

I then tied the ends of both cords together, and hung it up on my wall using thumb tacks.

I will admit that it didn’t turn out exactly as I had originally pictured, but I am still pretty satisfied! Once again, the thing I love about this type of craft is that it’s open to interpretation, and it becomes it’s own unique little thing every time you make it. Exact copies are nearly impossible. It brings some sparkle to my desk area, and reminds me to stay wild. *Warning: Sappiness ahead* Don’t let the world tame you, and mold you into a shape that always fits in a box. *Can’t Be Tamed by Miley Cyrus starts playing in the background* I am serious though. Be your own beautiful selves darlings!


 Tavi Gevinson
  Amandla Stenburg
 Rowan Blanchard

